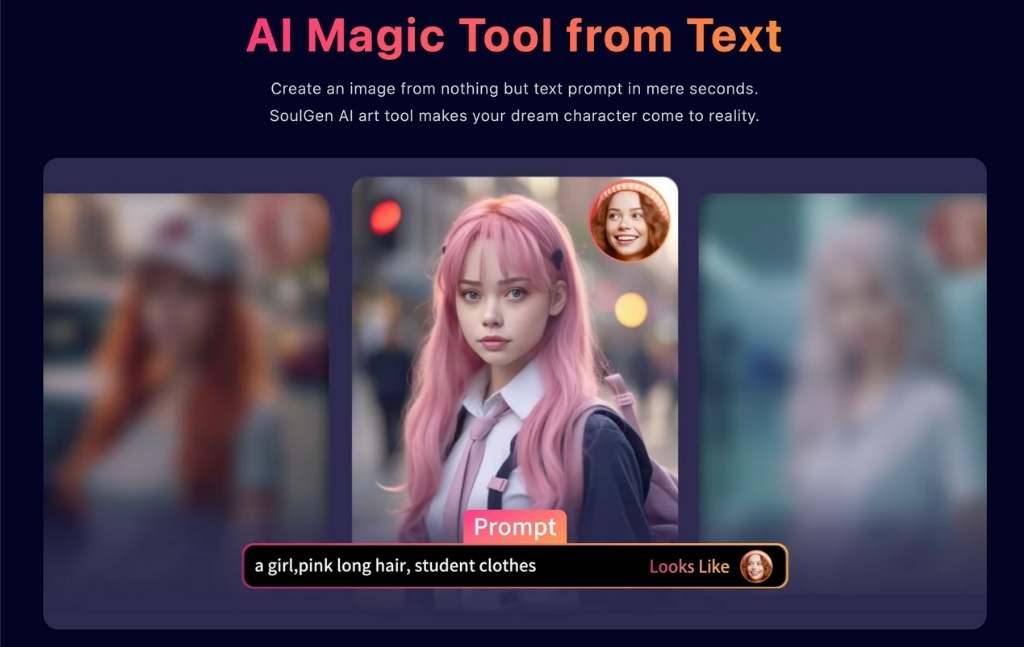
SoulGen is a browser created AI image generator best known for creating beautiful character portraits, female generally in anime, manga or semi realistic style.
The platform advertises itself – to some extent - on the concept of visualizing your “dream character” from text prompts and built-in tags.
There is no software to download. Turn on your browser, describe what you are envisioning, fiddle with some sliders or tag options and the A.I. will serve up a new image in seconds.
These aren’t just random faces that are being spat out; SoulGen’s engine is trained on a vast dataset that creates consistent, visually pleasing results, which is why people in search of a certain “AI girlfriend” aesthetic will often go for it.
Soulgen AI Hentai Generator: Detailed user guide
Step 1 – Open AI Character and choose “Anime Character”

Where it is
In the top navigation bar, click AI Character (it’s highlighted in your screenshot), then pick Anime Character from the dropdown list.
What this does
This is important because it switches the generator into the anime-focused workflow. If you accidentally leave it on Real Character or DreamTwin Character, your prompts might produce a different style or different behavior.
Visible UI elements in this step
- Dropdown entries: Real Character, DreamTwin Character, Anime Character
- The currently selected option shows as a pill/tab on the generator page (you’ll see “Anime Character” highlighted later).
Step 2 – Write your prompt in “Enter prompt”
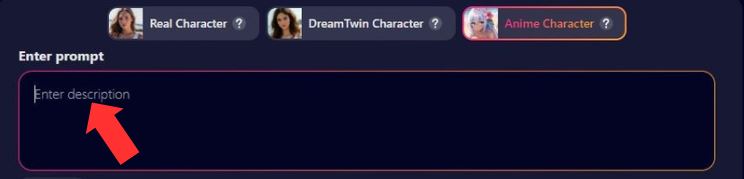
Once you’re in Anime Character, you’ll see three pill-style tabs at the top of the prompt area:
- Real Character ?
- DreamTwin Character ?
- Anime Character ? (this one is highlighted/selected in your image)
Those little question mark icons usually mean “hover/click to learn what this mode does” (even if you never click them, they’re helpful when you’re unsure why results look different).
The prompt box
- Label: Enter prompt
- Placeholder: Enter description
- It’s a big multi-line box, which means the tool expects full descriptions-not just two words.
How to write prompts that actually work
A good anime-character prompt typically has 5 parts:
- Who: “adult anime woman / adult anime man / adult character”
- Face & vibe: eyes, expression, mood
- Hair: length, style, color
- Outfit: clothing, accessories
- Scene & lighting: background, camera angle, light style
Example prompt you can paste (safe, non-explicit but clearly “anime pin-up energy”):
Adult anime woman, long silver hair, sharp confident eyes, subtle blush, elegant pose, detailed face, stylish outfit with layered fabric, cinematic lighting, high-detail anime illustration, clean linework, soft shading, high quality
Quick prompt upgrades (small changes, big payoff)
| If your results are… | Add / adjust this in the prompt |
| Too generic | Add 2–3 specifics: “braided hair”, “gold earrings”, “freckles” |
| Face looks off | Add: “detailed face, symmetrical features, clear eyes” |
| Outfit messy | Describe fewer outfit elements but more clearly |
| Background chaotic | Add: “simple background” or “soft blurred background” |
| You want a more “anime-real” look | Use “realistic anime style, detailed shading” |
Step 3 – Choose a style (Cartoon / Classic / Real Anime)
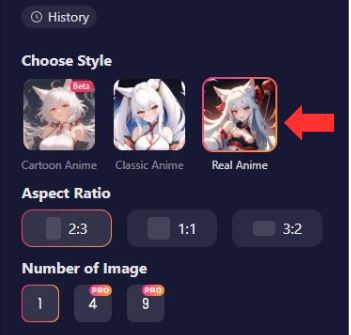
In Choose Style, you have three selectable tiles:
- Cartoon Anime (has a small Beta tag)
- Classic Anime
- Real Anime (shown selected with a bright outline in your screenshots)
What each style is good for
| Style | What it tends to feel like | When to use it |
| Cartoon Anime (Beta) | More playful / simplified | Cute, chibi-ish, “soft” looks |
| Classic Anime | Traditional anime illustration vibe | General anime character designs |
| Real Anime | More detailed, polished, semi-real anime feel | Portraits, “high detail” characters, poster-like outputs |
Tip: If you’re aiming for a character that looks like it belongs on a premium illustration card, Real Anime is usually the move. If you want lighter, simpler lines, go Classic or Cartoon.
Step 4 – Pick an aspect ratio (2:3 / 1:1 / 3:2)

Under Aspect Ratio, you have three buttons:
- 2:3
- 1:1
- 3:2
How to choose the right one
| Ratio | Best for | Why |
| 2:3 | Full-body / character posters | Taller frame fits more of the character |
| 1:1 | Profile pics / avatars | Balanced, centered compositions |
| 3:2 | Wider scenes | Fits background, scenery, duo poses better |
If you’re unsure: start with 2:3. It’s the safest default for “I want to see the whole character.”
Step 5 – Choose “Number of Image” (1 / 4 PRO / 9 PRO)

Under Number of Image, you can pick:
- 1 (free/basic)
- 4 (marked PRO)
- 9 (marked PRO)
That PRO label is a big clue: generating 4 or 9 images at once is likely a paid feature or requires a subscription/credits.
Why generating multiple images matters
AI image generation is a bit like fishing. Same bait, different catch.
If you generate 1, you’re rolling the dice once.
If you generate 4 or 9, you’re much more likely to get at least one “wow, that’s the one” result-especially when you’re refining a character design.
Step 6 – Click Create and generate your anime character
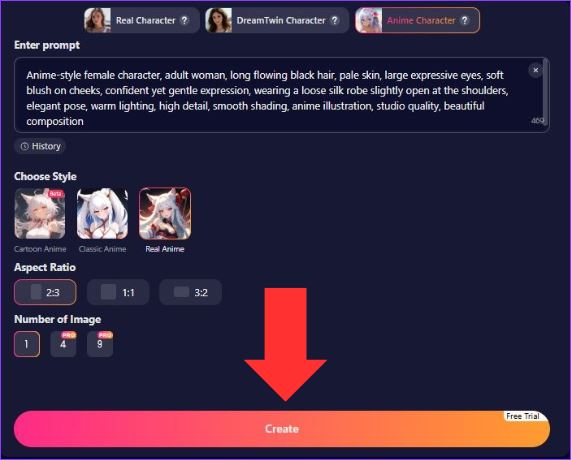
This is the moment where everything you’ve set up finally comes together.
At the bottom of the interface, you’ll see a large gradient button labeled “Create”, stretching almost the full width of the screen. On the far right of that button, there’s a small “Free Trial” indicator, letting you know this generation is covered by available free credits (or that you’re still within trial limits).
What happens when you click Create
Once you click Create, the generator immediately starts processing all your selections:
- Mode: Anime Character
- Prompt: Your full descriptive text
- Style: (in your screenshot, Real Anime is selected)
- Aspect Ratio: 2:3 (ideal for full-body or poster-style characters)
- Number of Images: 1 (or more if you chose a PRO option)
Behind the scenes, the AI combines:
- Your written description
- The selected anime model
- The composition rules from the aspect ratio
- The rendering depth from the style choice
You don’t need to click anything else or confirm again. One click is enough.
During generation (what to expect)
After clicking Create:
- The button usually becomes inactive or shows a loading state
- The system takes a few seconds to a minute (depending on server load and image count)
- You stay on the same page-no redirects
This is normal. Don’t refresh the page unless it freezes for an unusually long time.
When the image is ready
Once generation finishes:
- Your anime character image appears on the page
- You’ll typically have options to:
- View the image in full size
- Download it (resolution depends on free vs PRO)
- Reuse or tweak the prompt
- The generation is automatically saved under History, so you can come back to it later without losing your work
If you don’t love the result, that’s expected. Most users iterate:
- Slightly adjust the prompt
- Change style (Classic ↔ Real Anime)
- Generate multiple images at once next time
The Experience – What You Actually Do
It’s not rocket science. You:
- Pick a style – anime, realistic, stylized, etc.
- Write a prompt – e.g., “long hair, confident smile, futuristic outfit”
- Adjust optional attributes – hair color, eye shape, lighting
- Hit Generate
Then you wait a few seconds and the generated image appears.
In many ways it’s like ordering coffee: you give preferences instead of coffee beans, and the AI blends it into a picture instead of a latte.
There’s no mobile app, so desktop or tablet browsing is the way to go. Premium users get higher-res downloads, but even the free tier gives you a taste of the system.
How SoulGen Compares to Other Tools
Here’s a quick comparison so you can see where it stands:
| Feature | SoulGen | Typical Alternative |
| Browser-only global access | Yes | Varies |
| Anime-/character-first focus | Strong | Often general art |
| Quick learning curve | Very easy | Often steeper |
| Free tier with limitations | Yes | Some require paid first |
| Download high-res | Paid upgrade | Mixed |
| Customization of looks | Extensive | Variable |
SoulGen tends to grab attention because it’s strong in character appearance customization – like body type tags, hairstyle, outfit style – which is a big reason people think of it as an “AI girlfriend visualizer.”
But don’t expect a built-in chatbot or interactive AI persona; this is image creation, not conversation.
What You Can Customize
You can think of this like a dress-up game but with AI painting skills:
| Customization Type | What It Affects |
| Style Presets | Anime, realistic, dreamy, etc. |
| Text Tags | Eye color, hair length, expression |
| Detail Prompts | Clothing style, mood, lighting |
| Outputs | Single images or batch generations |
There’s no voice, no bot personality, and no interactive girlfriend AI in the sense of a chatbot – at least not currently.
If you’re imagining an AI that talks back to you, that’s a different class of product. SoulGen stays within the image-generation world.
Pricing – What to Expect
SoulGen runs on a freemium model:
| Tier | What You Get |
| Free | Low-res images, limited daily credits |
| Paid (Monthly) | Higher resolution, more credits |
| Paid (Annual) | Lower per-month cost, more total output |
Prices are modest compared to some other tools, but if you fall down the rabbit hole testing style tags and variations, credits can disappear faster than you think.
My Personal Take (No Fluff)
If you’re interested in trying to visualize how a character will look when it pops out of your imagination, SoulGen is one of the more intuitive and accessible ways to do it.
It’s not wizard -it’s finely calibrated image generation that capitalizes on character aesthetics.
You’ll be spending more time tweaking prompts than learning menus, and the quality of outputs could be better than what some generic art generators do.
Is it perfect? Nope. You’ll encounter the usual A.I. oddnesses (weird anatomy here, an expression that doesn’t track with your brain’s idea of “smile” there) but that’s part of the fun of playing with generative tools.
The more precise you are with how you articulate prompts, the better your results will be.
A Few Honest Real-Talk Points
- You aren’t getting an interactive “AI girlfriend with feelings.” This is visual creation.
- If you want only wholesome character art, treat that as a boundary and use wholesome prompts.
- The free tier is enough to experiment, but paid credits make it a lot more satisfying.
- You will learn a mini-skill – prompt crafting – and that’s a perk of these tools.
Final Thoughts Before You Try It
If you’re looking for a creative playground to bring your weird characters to life – and it’s quick, relatively cheap and browser-based -with I think absolutely are worth a spin.
You don’t have to be a tech wizard, and after a couple of tries you’ll start to sound like your own private Edgar Allan Poe: “Hmmm What if I gave her … silver eyes and a cloak?” – and that’s when there begins to be fun.