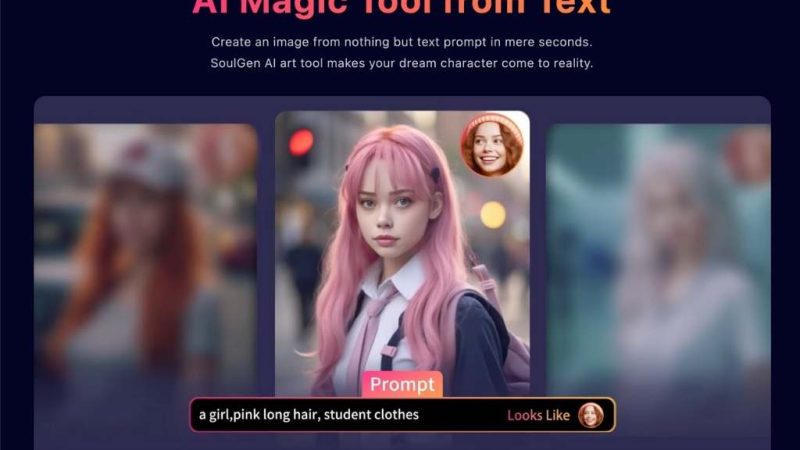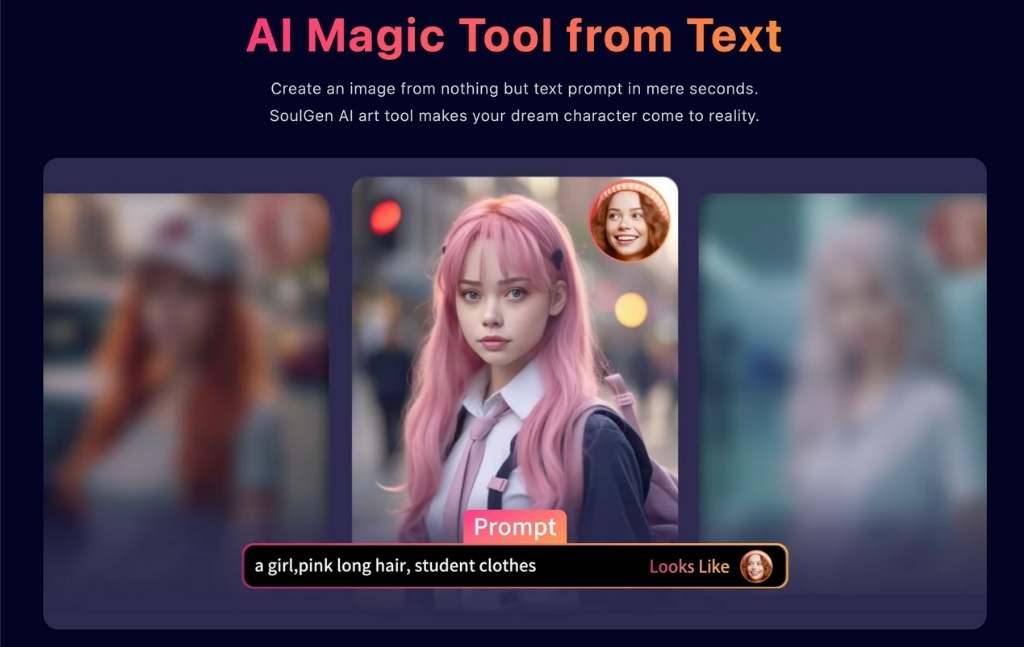
Soulgen is one of these online AI image generators getting play for its realistic character images and “stylizated” results.
Think of it as a creative portrait machine: You feed in a prompt, and it spits out imagery based on your words and what it has learned from models.
You may have seen other tools like Midjourney or Stable Diffusion – Soulgen lives in that same playground, but has its own flavour.
A comprehensive guide of how to use Soulgen AI Image Maker
1) Step One – Upload an image (the starting point)
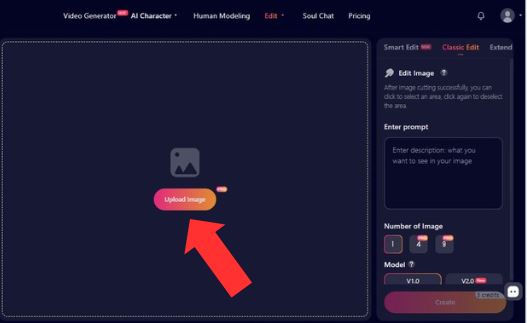
Where to upload
In the center of the big left canvas there’s a button:
- Upload Image
It sits inside a large dotted rectangle, which is a typical “drop zone” style area. In other words:
- Click Upload Image to pick a file from your device
- Or (often with layouts like this) you may be able to drag-and-drop an image into the dotted area (even if it doesn’t explicitly say it, the dotted box is usually a giveaway)
What happens after upload
Once uploaded, your image should appear inside that dotted canvas area. This becomes your “base” image for edits.
2) Step Two – Choose your edit mode (Smart / Classic / Extend)
At the top of the right-side panel, you’ve got mode tabs:
- Smart Edit (Beta)
- Classic Edit (selected in your screenshot)
- Extend
Here’s what those usually imply in tools like this (and what your UI hints support):
| Mode | What it’s best for | What to expect |
| Smart Edit (Beta) | Fast, “do what I mean” edits | More automatic interpretation, sometimes unpredictable (beta energy). |
| Classic Edit | Controlled edits where you guide the result | More manual and reliable if you like being specific. |
| Extend | Expanding the image beyond its borders | Often used for outpainting / extending backgrounds. |
If you’re learning the tool, Classic Edit is a good place to start because it’s usually the most “literal.”
2) Step Two – Write your prompt (this drives the output)
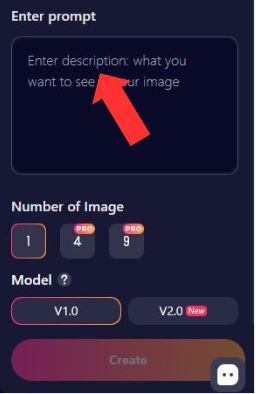
On the right panel you’ll see:
Enter prompt
A textbox with placeholder text like:
- “Enter description what you want to see in your image”
This is where you tell the generator what you want changed/created.
How to write prompts that actually work
You’ll get better results if you write prompts like you’re giving directions to a picky designer:
Good prompt structure (easy win):
- Subject (what)
- Details (materials, colors, style)
- Lighting (soft light, studio light, sunset, etc.)
- Camera vibe (close-up, wide shot, shallow depth of field)
- Quality words (detailed, sharp, realistic, cinematic)
Example (generic, safe):
“Add a red leather jacket with realistic folds, soft studio lighting, detailed texture, natural shadows, high detail.”
If your result is close but not quite there:
- Keep the same prompt and change one detail at a time
- Or rewrite it with fewer adjectives (too many instructions can confuse models)
3) Step Three – Choose how many images you want (1 / 4 / 9)
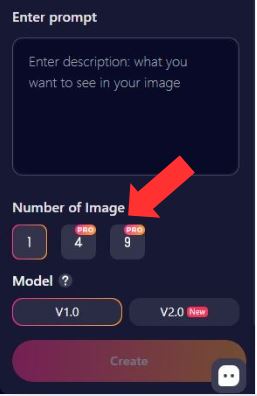
Under Number of Image, there are three options:
- 1
- 4 (labeled PRO)
- 9 (labeled PRO)
This is basically output quantity:
- 1 image = quick and cheap (good for testing prompts)
- 4 images = more variety (but PRO)
- 9 images = maximum variety (also PRO)
What “PRO” implies here
Those PRO badges typically mean:
- You need a Pro plan, or
- It costs more credits, or
- Both
If you’re dialing in a prompt, start with 1. Once it’s working, jump to 4 so you can pick the best variation.
4) Step Four – Pick the model (V1.0 vs V2.0 New)
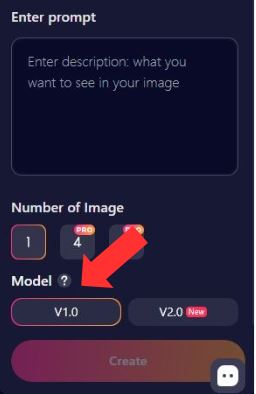
Under Model ?, you have:
- V1.0
- V2.0 (New)
There’s also a small question mark next to “Model,” which usually indicates a tooltip explaining differences (quality, realism, speed, credit cost, etc.).
How to choose between them
Since V2.0 is marked New, it commonly means:
- Better quality / better prompt understanding
- Possibly higher credit cost
- Sometimes slightly slower (depending on infrastructure)
A practical approach:
| If you want… | Pick… |
| Predictable, “baseline” behavior | V1.0 |
| Better quality / improved interpretation | V2.0 (New) |
If V2.0 gives you results that feel “overcooked” or too stylized, switch back to V1.0.
5) Final Step – Click Create (and mind the credits)
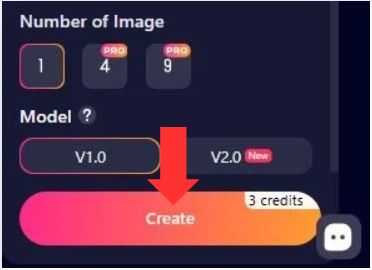
At the bottom of the right panel is a big gradient button:
Create
Next to it (or attached to it) you can see a label like:
- 3 credits
That’s your cost indicator: clicking Create spends credits to generate the images based on:
- Your uploaded image
- Any selected edit area
- Your prompt
- Your number-of-images setting
- Your chosen model version
What to do right before you click Create
Quick checklist:
- Image uploaded?
- Correct mode selected (Smart / Classic / Extend)?
- Any area selected (if you want local edits)?
- Prompt written clearly?
- Number of images set (1 vs PRO options)?
- Model set (V1.0 / V2.0)?
- You’re okay with the credit cost shown?
Then hit Create.
People like it because:
- It’s accessible via a browser – no installs, no weird dependencies.
- It often produces human-like characters that look detailed and expressive.
- There’s a bit of a fun factor – outputs can surprise you in charming and weird ways.
If You’re Curious, Here’s What Users Talk About
Have you ever asked an AI to draw something wild and then chuckled as it totally missed the mark?
Soulgen cando that, too - with theatrics running somewhere between “Whoa, that’s actually kind of decent” and “Uhh … no.”
This unpredictability is part of the fun, and part of the frustration. Occasionally you fine-tune a prompt and - magic. Other times it’s a dozen tweaks, and you’re still not sure the A.I. isn’t trolling you.
People often ask:
“Can it do detailed character expressions?”
Yes, it’s decent at faces and expressions – especially when you give it clear descriptors.
“Is it high-res?”
For web tools like this, the resolution is fine for screens but not print-grade unless you upscale.
Behind the Scenes – What Powers It
Soulgen likely uses variants of large diffusion models – very similar in concept to a lot of other generative AI tools. That means:
- It learned from tons of images.
- It predicts pixels based on text cues.
- The “style” is baked in from training data.
Because of that training:
- It tends to favor popular artistic themes.
- It can sometimes blend features in unexpected ways.
- It doesn’t understand text the way humans do – it infers patterns.
That’s why you sometimes see weird body parts or odd artifacts – the AI is guessing, not knowing.
What You Can Use It For
Here are some examples of creative use cases where the tool shines (and stays safe):
- Character concepts for stories or games
- Portrait-style art with mood and expression
- Stylized avatars
- Costume or design mockups
| Use Case | Strength | Notes |
| Character Concept Art | Strong | Especially with detailed prompts |
| Stylized Portraits | Good | Works well for themed series |
| Creative Exploration | Fun | Good for inspiration, not production-ready art |
There’s a sort of joy in prompting something vivid and getting a result that feels alive – and Soulgen manages that pretty well.
The Human Side of Using Tools Like This
And truth be told, the most fascinating thing about AI image makers isn’t even the tech – it’s how people use and abuse them.
When you type a prompt, you kind of end up in a conversation with the model.” You hint, you nudge, you edit.
You mess up every now and again, and it comes out to be something so hilariously off. Other times, it surprises you.
And that trial-and-error - well, that’s where the actual experience resides. It’s not perfect, and it’s not supposed to be. It’s a mirror that shows you what you ask it to show.
You’ll laugh at some outputs. You’ll be impressed by others. And there’s more time for tweaking than you think.
Limitations & What You Should Know
Here’s the part most reviews gloss over: AI image generators are not consistent artists. They’re pattern machines. There are quirks:
- Strange anatomy mistakes happen.
- Lighting and perspective can be iffy.
- Repetitive elements might look unnatural.
And because AI models are built from existing data, they reflect biases and patterns that aren’t always obvious at first glance.
Also – and this matters – any public web-based image generator is governed by terms of service and legal/ethical guidelines. That means:
- Certain types of content might be blocked or filtered.
- Tools may update restrictions without notice.
Respecting those rules isn’t just polite – it protects you and the platform.
Final Thoughts
If you’re someone who likes:
- Playing with visual creativity
- Seeing what an AI will invent from your words
- Iterating a concept until it feels “right”
…then Soulgen is worth a spin.
It’s not a magic wand. But for a browser-based generator that gives you character images with personality and nuance, it’s solid and entertaining.
Just go in with playful curiosity, not expectations of perfection.